INTRODUCTION
So a lot has been going on in the remote support world these days. We’ve moved a lot between DameWare, Remote Desktop, VNC and others to TeamViewer, AnyDesk and lots of other options that are currently available.
Personally, I may be moving away from using the blog to document stuff as it seems to break at times with the links and media - which doesn’t happen on the forums. Maybe it’s my inexperience with that though, but I do find things easier to manage here - and migrate as well.
Let’s get into how to get remote support from me using RustDesk.
Why RustDesk?
Simply put - it works on all platforms and allows me to provide support from my mobile device.
AnyDesk & TeamViewer
Yes I’ve had licenses with those - I still have a lifetime license for TeamViewer 11, but I’m moving away from them as much as possible. Will get into more details here when next I can.
Remote Utilities
This was my #1 go-to tool, but it’s moved to my #2 now as it does not allow me to access my address book from my phone and the mobile app needs more work. They’ve recently (2024) allowed remote support on Mac systems.
Security
This has been a major concern over the years and has resulted in the push for self-hosted servers. Downloading directly from my website will give you a client that should only allow for connections from me as it’s tied to my server.
Install Or Run?
Unless I provide remote support to you frequently, you only need to run as admin or allow access for me to proceed with checks on your system. If reboots are required then an install can be done. Once support is no longer needed the software can be removed.
INSTRUCTIONS
Firstly - go to the website and go to REMOTE.
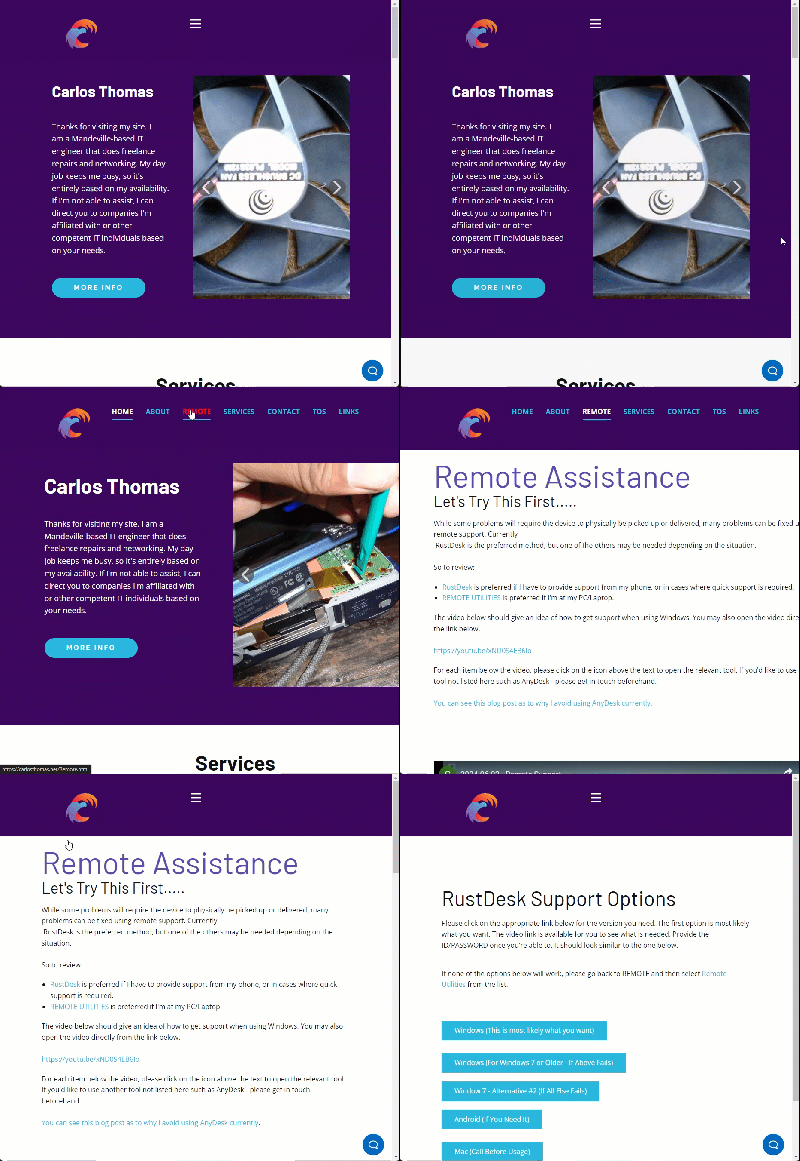
Once there - select RustDesk from any of the available links. The animated GIF above should show what to do and where to go.
The first option is most likely what you need on Windows. Make direct contact if the file doesn’t work.
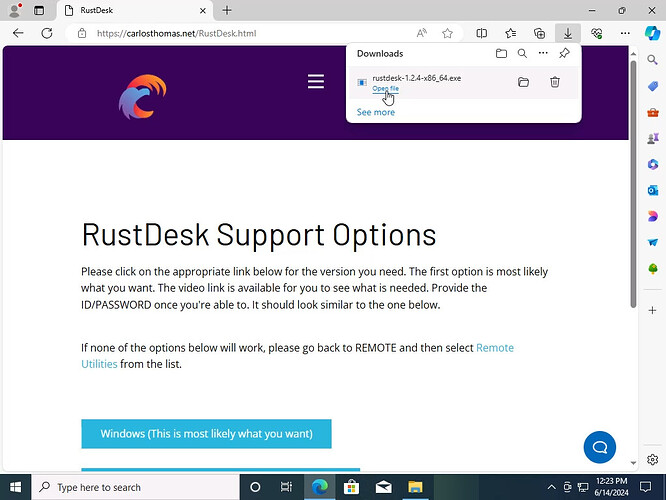
If your download completes with no issues, simply proceed to the section where you run and install.
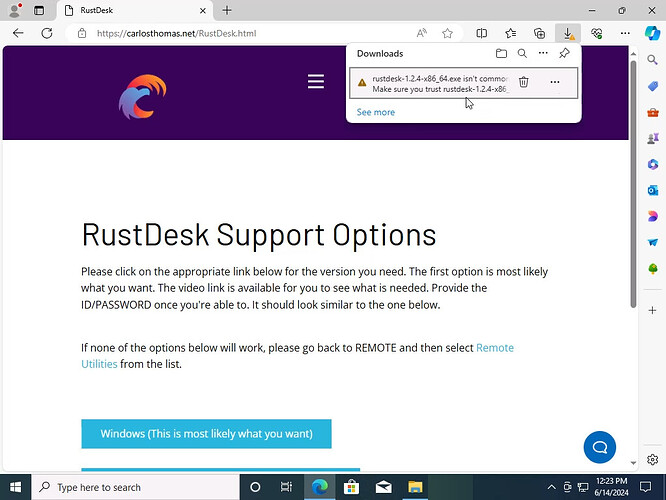
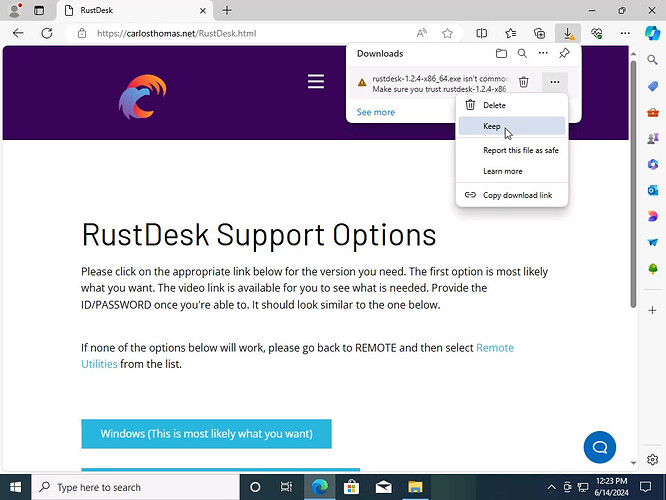
If you get an alert that the file isn’t trusted - ignore and tell it to keep the file. click the three dots then select “KEEP” from the list.
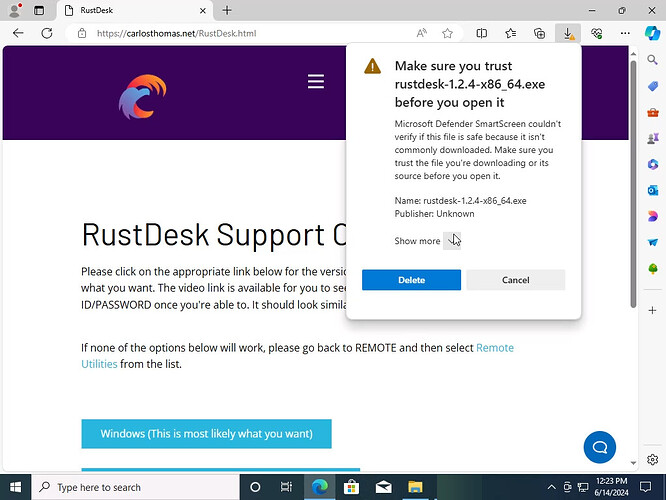
And even after doing that - they still want to be sure you want to keep the file. Click the down arrow beside “SHOW MORE”.
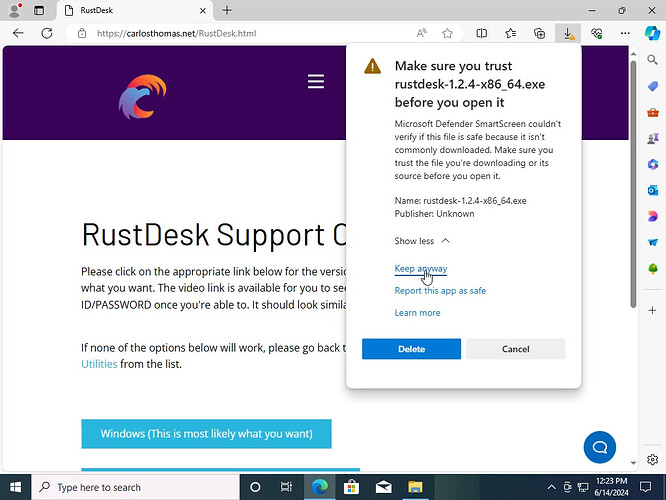
And then tell it to “Keep Anyway”.
I really wish we were done there - but now you have to open the file.
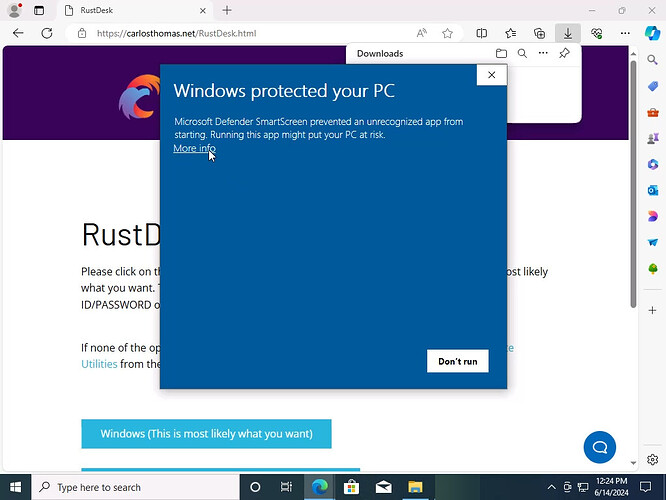
And then they ask you again about the file. Click “MORE INFO”.
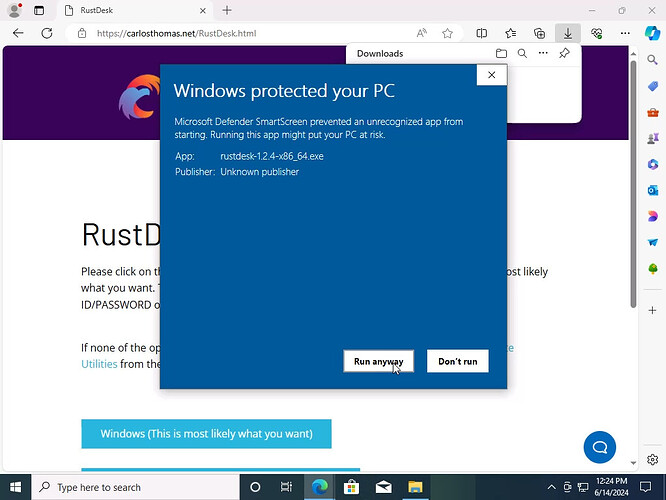
And then click RUN ANYWAY.
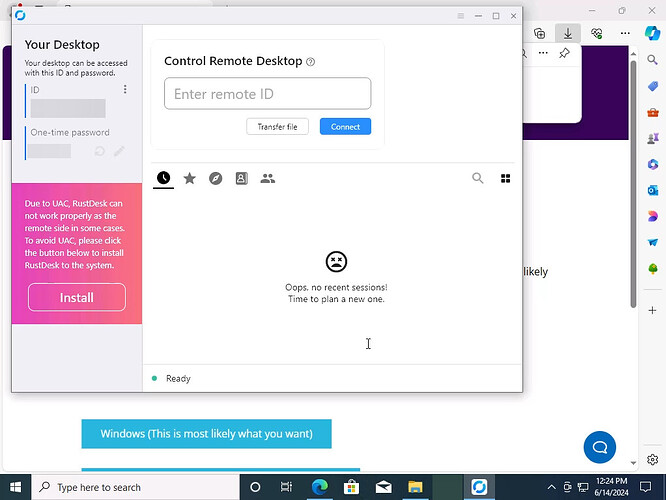
At this point you can FINALLY provide the ID and password.
If your file opened with no issues, you just need to run and provide the ID/PW.
